
Easy Assembly: Your Complete Bel's Metal Art Fire Pit Set-Up Guide
Transforming your outdoor space with a Bel's Metal Art fire pit is easier than you think. With our simple assembly instructions, you'll have your fire pit up and running in no time. In this guide, we'll walk you through each step of the process, ensuring a seamless set-up experience for maximum enjoyment of your fire pit.

Step One
Leg Assembly Start by gathering all the pack A bolts and nuts. Assemble all four legs, ensuring the legs with the Bel's Metal Art logo are positioned opposite each other. Remember not to tighten the bolts completely until the end, and ensure that the folds are on the inside of the fire pit.
Step Two
Side Panel Assembly Next, bolt the large sides together using pack A bolts and nuts. Make sure that the sides with the Australian-made logo are facing each other. Tighten the bolts fully only after completing assembly, and ensure that all folds are positioned on the inside of the fire pit.

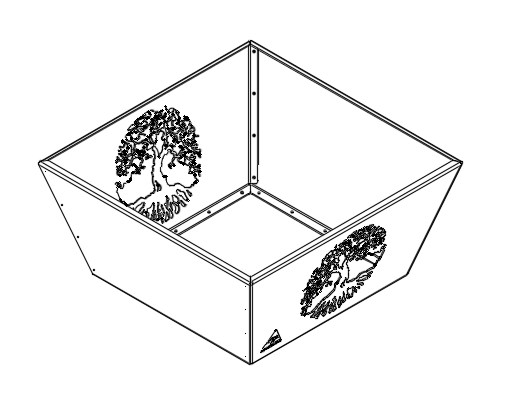
Step Three
Top Assembly Now, gather all the pack B bolts and nuts. Place the large sides on top of the legs, aligning the holes as best you can. Ensure that the legs with the Bel's Metal Art logo and the Australian Made Logo are on the same side. Insert the base on top and bolt together all three components securely.

Step Four
Final Adjustment After assembling all the components, tighten all the bolts firmly, being careful not to overtighten as it may damage the bolts.
Congratulations! Your Bel's Metal Art fire pit is now ready to light up your outdoor space. Simply follow our step-by-step set-up guide, and you'll be enjoying the warmth and ambiance of your fire pit in no time. Sit back, relax, and bask in the glow of your beautifully assembled fire pit. Here's to many memorable moments around the fire with family and friends.